Tips for Using the SB1
In no particular order, here are a number of tips learned from using
the SB1 over a number of years.
Tip #1: The most common question received about using the SB1 is what do you
do when you run out of clecos to secure the tool. For years the answer was
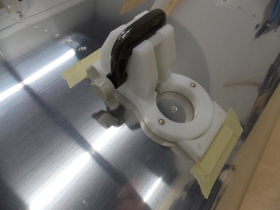
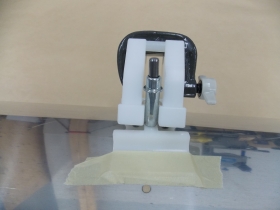
simply to use some masking tape as shown below to hold down SB1 to the
surrounding surface. It does take a minute or two to properly apply enough
masking tape to ensure a stable result.
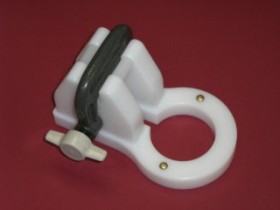
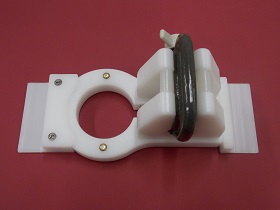
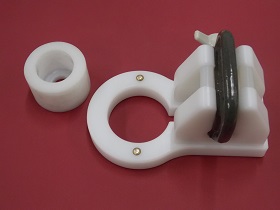
While using masking tape alone can be acceptable, a pair of SB1 Hold Down Accessories
have been developed to make the process faster, use less tape, enable a more
consistent and secure configuration, and just be easier to accomplish the task.
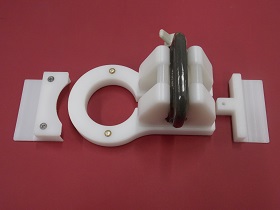
If there is only one cleco available to secure the SB1, use either or both of
the accessories to provide at least a second anchor point. If no clecos are available,
use both the hold down accessories to ensure the SB1 remains stationary. A strip
of masking tape across each utilized accessory is all that is required.
Yes it takes a few seconds to do this, but plan the order in which you rivet to
minimize the occurrences.
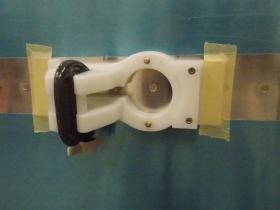
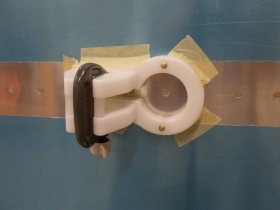
The above illustrates the use of the accessory hold downs to aid in the
cases where only one or even no clecos are available to anchor the SB1.
If you are working on a vertical surface, or even up-side-down, add an extra
piece of tape or two in order to offset the loss of gravity being on your side.
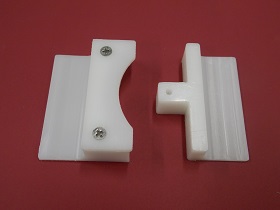
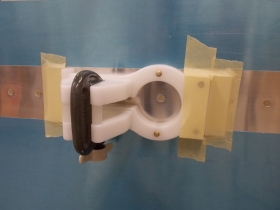
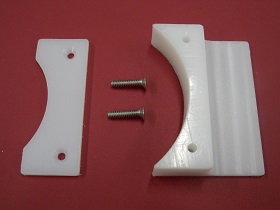
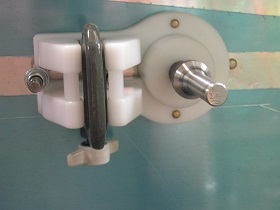
Tip #2: The horizontal cap can be removed from the curved Hold Down
Accessory for cases where the SB1 is being used on a curved surface.
An extra piece of masking tape should be added to prevent SB1 movement away from
the surface given the absence of the small horizontal cap which would normally
perform that function.
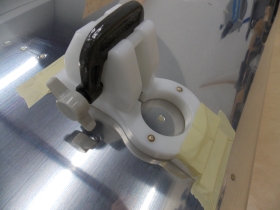
The above two pictures illustrates securing the SB1 where a curved surface is
involved and making use of both accessories, the second picture has the extra
piece of tape showing how it can take the place of the horizontal cap where the
forward end of the SB1 is no longer flush to the skin surface due to the curvature.
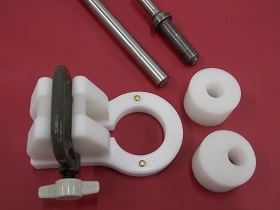
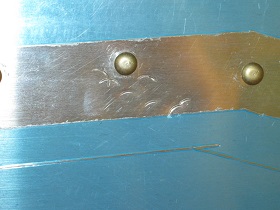
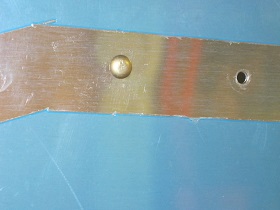
Tip #3: Make a special cleco or two by filing the lip off flush to the body
on opposite sides to make riveting around curved surfaces possible with
the SB1, such as the vertical stabilizer, wing leading edges, or rounded
portions of a fuselage. Don't remove the entire lip or cleco pliers will
not work particularly well.
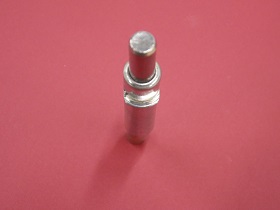
A modified cleco above so it can be clamped anywhere along the body in the SB1.
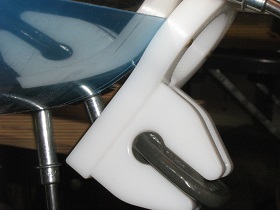
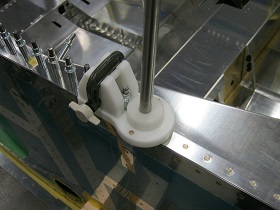
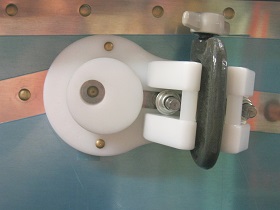
Above is the SB1 being used on a curved surface, note how the SB1 is positioned
to be parallel to the skin surface where the center of the mushroom set will be
held. Using the two embedded rivets in the SB1 as a visual guide help in this
task. Those two rivets that are part of the SB1 also assist in visually centering
the SB1 around the rivet to be set, they aren't just bling.
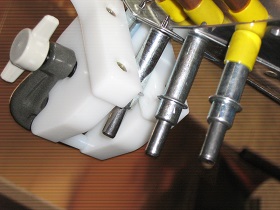
Above illustrates how the SB1 is being clamped across the rear modified cleco
that has had part of the flange removed so it doesn't interfere with the clamping
mechanism.
The rear Hold Down Accessory could even be used with a cleco or modified cleco should you
back yourself into a situation on a curved surface. Now you know what why that
hole was added in the rear Hold Down Accessory.
Tip #4: Do NOT exclusively use a single cleco to clamp the SB1 in place, it
really is not a good idea, see tips 1 through 3 above to get around this. Trying
to tighten the SB1 clamp onto a single cleco without using a second anchor
point is not a substitute for having two stabilization points, do not attempt to
use a single anchor point for the SB1.
Tip #5: While on the subject of things not to do, do NOT over tighten the
SB1 clamp, about 1/2 a turn is all that is required after it is snug against
the cleco(s).
Tip #6: The SB1 can be used with other sets, like a 1/2 diameter set from a
C-Frame by putting a 1/2 inch hole in a 1.5 diameter inch insert as show
below. If you make it offset from center, it makes minor alignment adjustments
possible. You can also use this setup to hold a standard rivet gun set for
AN470 type heads. This can actually make setting AN470 rivets easier with a
reduced chance of damaging the rivet head or having the rivet set bounce off
the head and damage the surrounding skin.
The above shows the use of a 1.5 inch diameter insert with a centered 1/2
diameter hole to stabilize a 1/2 inch diameter set from a C-Frame. While the
insert is not included with the SB1, it is easy to make. This particular case
shown above is where the mushroom set is larger in diameter than the flush area
around the rivet being driven, thus the need to use a smaller diameter set
then the standard mushroom set. The picture above is of an aluminum
surface that bends up just 3/8 of an inch from the line of rivets being
set. An insert such as pictured above with a centered hole will make
alignment automatic when used on a straight line of rivets, while a insert
with an offset hole allows for minor adjustments as well as allowing the hole
used to stabilize the set to be further or closer to the anchor clecos than
would normally be allowed with a insert with a centered hole. Make yourself
one of each.
Shown above is a generic shot of how a simple round insert can be used with a
standard 1/2 inch diameter AN470 type rivet set. This is a DIY item and not
included with the SB1.
The above is what you don't want to happen. Here a standard AN470 round head
rivet set was being used at close to arms length and was allowed to jump off
the head of the rivet and bring many smiles to the area, and not the good kind.
Using the setup pictured below which makes use of an offset hole in a 1.5
inch diameter insert can greatly reduce the chance of this added texturing
of the skin. The suggestion to use a slightly offset hole in the insert is
to allow for precise alignment over the center of the domed AN470 rivet head,
something that is not as critical when dealing with flush head AN426 rivets
where a slight misalignment from perfectly centered is of little importance
and is actually one of the advantages when using a mushroom set. In the case of
the AN470 type set, the closer to centered the set can be kept during the
process of setting the rivet not only reduces the chance of damaging
the surrounding skin, but it is much less likely the head of the rivet will
acquire unintended distortions.
The above illustrates the use of a round insert with an offset 1/2 inch diameter
hole to stabilize an AN470 set. The setting of an AN470 rivet is now less likely
to result in unwanted smiles, especially when they are being set by yourself in an
awkward position such as near you maximum reach. This insert is a DIY item and
not included with the SB1, but is easy to make.
The same AN470 rivet from the previous picture that was set at near arms length
using the 1.5 inch diameter insert with the 1/2 inch diameter offset hole.
Tip #7: Another variation of the above, make a 1.5 inch diameter insert to
hold a pulled rivet gun head in place so it won't slide sideways right
after pulling the trigger and gouge the surface next to the rivet,
it does not have to be a really tight fit to protect the surrounding area.
It likely is not a problem with some pulled rivet guns, but it was with the
cheap one being used by this builder, especially if only one hand was free
to hang on to the pneumatic tool.
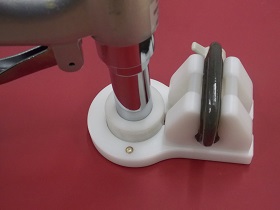
The above illustrates the use of a 1.5 inch diameter insert for the SB1 to
stabilize a pneumatic rivet puller. This easy to make DIY item is not included
with SB1. No reason you couldn't also make an insert for a manual rivet
puller if you find yourself damaging the surrounding area when the mandrel
breaks free.
Tip #8: Remove the metal portion of the mushroom set and sand the rubber
down so that the rubber no longer needs to be compressed to have the
metal impact the head of the rivet. While a minor improvement, the
distortion of the metal around the rivet will be reduced. The only
downside is that the mushroom set will no longer to appropriate for
single handed riveting. As a contingency, the designer
purchased a replacement rubber holder to be able to go back to the
original mushroom set configuration, but to date has never once
needed or wanted to make use of that option.
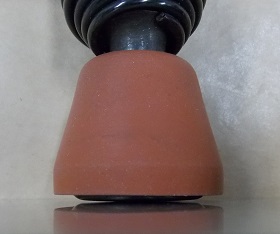
The above illustrates the gap between the rubber and the surface of
the mushroom set AFTER some rubber has been sanded off.
Tip #9: Holding the rivet set and bucking bar stable as well as square produces
far better results then when either is allowed to move significantly in
any direction other than that needed for the process of setting the rivet.
There are certainly far more applications and methods for the SB1 to accomplish
this than presented here or even thought of by the designer, don't be hesitant
to come up with your own techniques to produce higher quality workmanship with
less chances a rivet needing to be drilled out, thus saving time in the process.
Having to fix a rivet, especially a difficult one to reach, exceeds the time
needed to incorporate the use of the SB1.
|